Craving a warm, delicious dessert but short on time? The microwave apple crisp is your ultimate solution. Imagine turning fresh apples and simple pantry ingredients into a mouthwatering treat in just 10 minutes. This easy apple crisp recipe will become your go-to dessert for those sudden sweet cravings.
Forget complicated baking techniques. Our microwave apple crisp method brings simplicity and speed to your kitchen. With minimal preparation and quick cooking time, you can enjoy a homemade dessert faster than ever before. No fancy equipment needed – just your microwave and a few basic ingredients.
Key Takeaways
- Perfect single-serving dessert in under 10 minutes
- Requires minimal kitchen equipment
- Flexible recipe allows ingredient substitutions
- Low-effort method for instant dessert satisfaction
- Nutritious and delicious alternative to store-bought sweets
Introduction to Microwave Apple Crisp
Craving a quick apple dessert that doesn’t require hours in the kitchen? Microwave apple crisp is your perfect solution! This delightful microwave dessert turns ordinary apples into a warm, comforting treat in just minutes.
A microwave apple crisp is a speedy version of the classic baked dessert. It delivers maximum flavor with minimal effort. Unlike traditional methods that demand long baking times, this quick apple dessert can be prepared and cooked in under 15 minutes.
What is Microwave Apple Crisp?
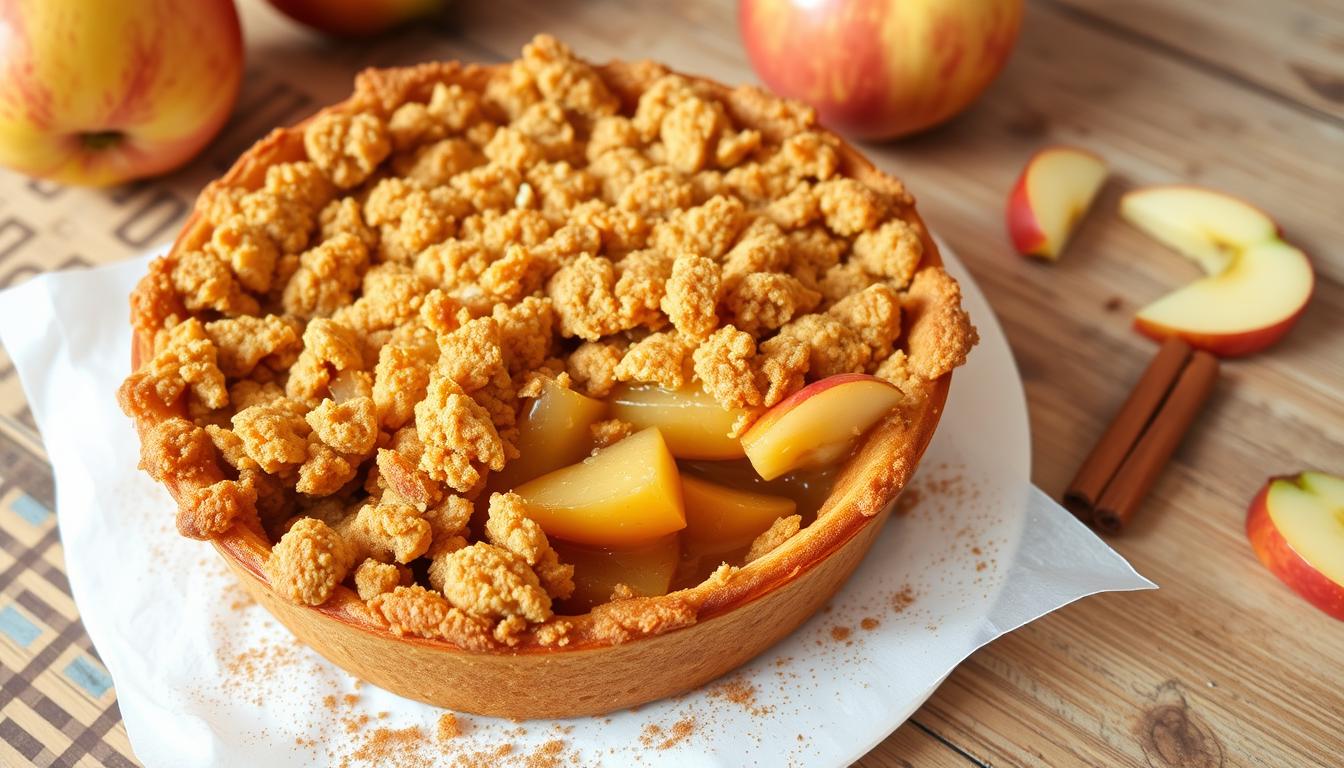
At its core, microwave apple crisp is a simplified dessert. It features fresh apples topped with a crispy, sweet crumble. The dish combines:
- Fresh, sliced apples
- A buttery oat-based topping
- Warm spices like cinnamon
- Quick cooking technique
Why Choose a Microwave Version?
The beauty of a microwave dessert lies in its convenience. With just a few simple ingredients and minimal preparation, you can enjoy a delicious dessert without heating up your entire kitchen. Perfect for busy home cooks or those wanting a quick sweet treat!
Key advantages of microwave apple crisp include:
- Significantly reduced cooking time
- Energy-efficient preparation
- Less cleanup compared to traditional baking
- Consistent results every time
Whether you’re a novice cook or a seasoned baker, this microwave apple crisp offers a foolproof way to satisfy your dessert cravings in record time.
Ingredients You’ll Need
Making a tasty cinnamon apple dessert starts with picking the right ingredients. Your microwave apple crisp needs special components. These will turn simple items into a delicious treat.
Fresh Apples to Use
For the best taste, pick apples that stay firm when cooked. Good choices are:
- Granny Smith (5 medium apples)
- Honeycrisp
- Braeburn
- Golden Delicious
Topping Ingredients for Perfect Apple Crisp Topping
Your apple crisp topping needs these key items:
- 1 cup old-fashioned oats
- 1/3 cup chopped pecans
- 2 tablespoons coconut oil
- 1 tablespoon maple syrup
- 3/4 cup brown sugar
- 3/4 cup flour
- 1 teaspoon cinnamon
- 1 teaspoon nutmeg
Optional Add-Ins for Extra Flavor
Add these creative touches to your cinnamon apple dessert:
- Vanilla extract
- Dried cranberries
- Sliced almonds
- Caramel drizzle
“The secret to an incredible apple crisp is balancing sweet and spice in your ingredients.” – Baking Enthusiast
Every ingredient is key to making a delicious microwave dessert. By choosing fresh apples and making a great apple crisp topping, you’ll create a memorable treat.
Preparing the Apples
Creating the perfect microwave apple crisp starts with selecting and preparing your apples with care. The right preparation ensures even cooking and delicious results every time you make this fruit crisp recipe.
When preparing apples for your microwave apple crisp, follow these essential steps:
Choosing the Right Apples
Select firm, crisp apples that hold their shape during cooking. Granny Smith apples work best for this recipe, providing a perfect balance of tartness and texture. You’ll want 4 large apples for a standard 8-inch square dish.
Peeling and Coring Techniques
- Wash apples thoroughly under cool water
- Use a sharp peeler to remove the skin completely
- Cut the apple in half from top to bottom
- Remove the core using an apple corer or a sharp knife
Slicing for Perfect Cooking
Consistent slicing is crucial for even cooking in your microwave apple crisp. Cut apples into uniform 3/4-inch pieces to ensure:
- Even heat distribution
- Consistent texture
- Optimal cooking time
Pro tip: To prevent browning, toss your sliced apples with a little lemon juice. This keeps them looking fresh and prevents oxidation during preparation.
Quick preparation makes this fruit crisp recipe a go-to dessert for busy home cooks!
By following these simple preparation steps, you’ll create a delicious microwave apple crisp that’s sure to impress your family and friends.
Making the Topping
Creating the perfect apple crisp topping is an art that makes your microwave baking special. The secret is in choosing the right ingredients and mastering the mixing technique. This gives you a crisp texture that’s delightful.
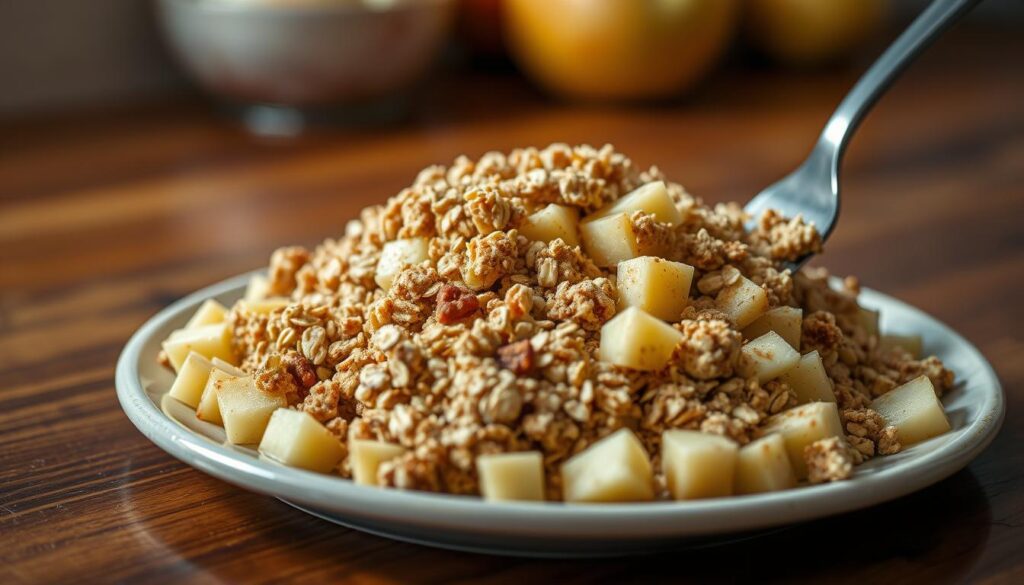
Your apple crisp topping needs a mix of ingredients that turn simple parts into a delicious dessert. Let’s look at the key elements:
Key Ingredients for the Crisp
- Rolled oats: The base of a great topping
- All-purpose flour or gluten-free flour blend
- Brown sugar for deep caramel notes
- Cold butter for a crumbly texture
- Optional: Chopped nuts like almonds or pecans
Mixing Techniques for a Perfect Texture
When making your apple crisp topping, aim for a crumbly mix. Use your fingers to mix cold butter into the dry ingredients. This method creates small butter chunks for a crispy, golden topping.
Pro tip for microwave baking: Keep your ingredients cold and work fast. This helps keep the topping crumbly but holds together when pressed.
For those with dietary needs, here are quick swaps:
- Use a 1:1 gluten-free flour blend
- Swap butter with coconut oil for a vegan option
- Reduce sugar by using monk fruit sweetener
Your homemade apple crisp topping is quick to make. It brings restaurant-quality dessert right to your microwave.
Combining Apples and Topping
Making a perfect microwave apple crisp needs careful layering and the right dish. Your easy apple crisp recipe will come together quickly with the right techniques and tools.
Layering for Maximum Flavor
To get the best results in your microwave apple crisp, follow these essential layering steps:
- Start with a thin layer of softened butter on the bottom of your microwave-safe dish
- Spread sliced apples evenly across the bottom
- Sprinkle a light coating of sugar and cinnamon over the apples
- Add the crisp topping in an even, generous layer
Choosing the Perfect Microwave-Safe Dish
Choosing the right dish is crucial for your microwave apple crisp. Look for these characteristics:
- Ceramic or glass dishes work best
- Choose an 8-inch square dish for optimal cooking
- Ensure the dish is at least 2 inches deep
- Avoid metal containers, which can spark in the microwave
When preparing your easy apple crisp recipe, remember that even distribution is key. Aim for uniform apple slices and a consistent topping layer. This way, each bite will be deliciously balanced.
Pro tip: Leave a small space at the top of the dish to prevent overflow during cooking.
Cooking Your Microwave Apple Crisp
Making a microwave dessert needs precision and knowing your kitchen appliance. This quick apple dessert is ready in minutes. It’s perfect for those who want a sweet snack fast.
Ideal Cooking Time and Power Settings
Your microwave apple crisp needs careful cooking times and power levels. Here’s what to use:
- Total cooking time: 3-5 minutes
- Power level: Medium-high (70% power)
- Apple cooking time: 90-120 seconds
- Topping cooking time: 60-90 seconds
Tips for Checking Doneness
Knowing when your quick apple dessert is done is important. Look for these signs:
- Apple texture: Apples should be tender but not mushy
- Topping should be golden and slightly crisp
- Juices should be bubbling slightly around the edges
- Internal temperature should reach approximately 165°F
Pro tip: Let your dessert rest for 1-2 minutes after cooking. This helps the crisp set and prevents burns. It also ensures even heat distribution.
Remember, microwave wattages vary, so adjust cooking times accordingly and always watch your dessert closely!
Serving Your Apple Crisp
Your microwave apple crisp is ready to delight your taste buds! This quick and delicious cinnamon apple dessert deserves the perfect presentation. It will elevate your dessert experience.
The beauty of a microwave apple crisp is not just in its quick preparation. It’s also in its versatile serving options. Here are some mouthwatering ways to transform your simple dessert into a gourmet treat:
Best Serving Suggestions
- Serve warm for maximum flavor intensity
- Use a small ramekin or microwave-safe bowl for individual portions
- Garnish immediately after cooking for best visual appeal
Topping Ideas to Enhance Flavor
Transform your microwave apple crisp from good to extraordinary with these delectable toppings:
- Classic Vanilla Ice Cream: A scoop of cold, creamy ice cream creates a delightful temperature contrast
- Whipped Cream: A light, airy topping that adds richness
- Caramel Sauce Drizzle: Adds a luxurious sweetness
- Chopped Nuts: Sprinkle 1 tablespoon of pecans for added crunch
- Cinnamon Dusting: Enhance the warm, spicy notes of your dessert
With just 5 minutes of total preparation time, this microwave apple crisp offers a quick, delicious dessert. You can customize it to your taste preferences. Enjoy your homemade treat!
Storing Leftovers
After enjoying your delicious microwave baking adventure with an easy apple crisp recipe, you’ll want to know the best ways to store and reheat your tasty dessert. Proper storage ensures you can savor every last bite of your homemade treat.
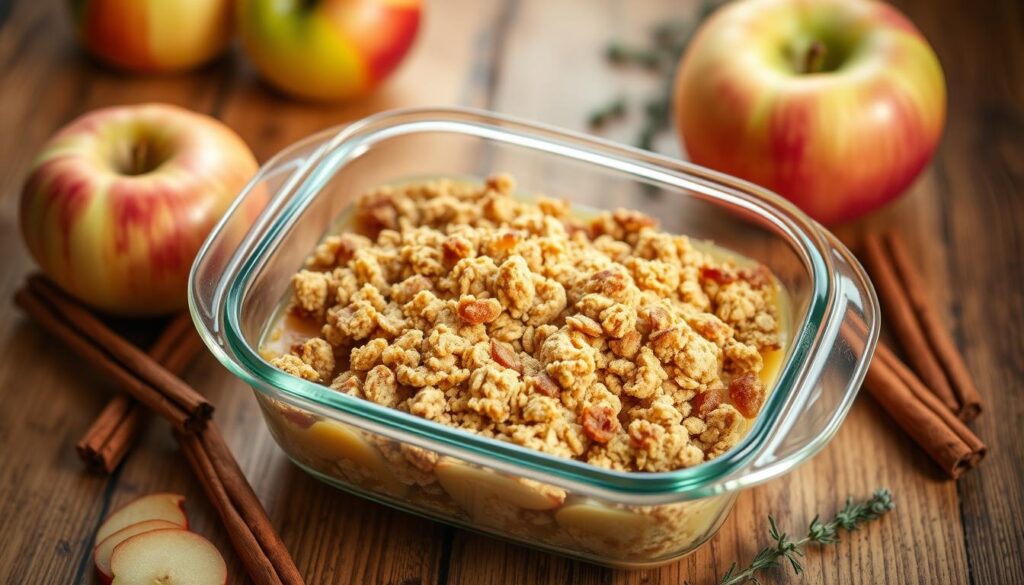
Storing your apple crisp correctly is crucial for maintaining its delightful texture and flavor. Follow these guidelines to keep your dessert fresh and delicious:
- Use an airtight container with a tight-fitting lid
- Store in the refrigerator immediately after cooling
- Consume within 2-3 days for optimal taste
Proper Storage Techniques
When storing your microwave apple crisp, choose a container that seals completely. Glass containers with locking lids work best to prevent moisture and maintain the crisp’s texture. Cover the dessert loosely to prevent condensation from making the topping soggy.
Reheating for Maximum Enjoyment
Reheating your leftover apple crisp is simple with these microwave baking tips:
- Remove the crisp from the refrigerator 10 minutes before reheating
- Use a microwave-safe dish
- Heat in 30-second intervals
- Check temperature and crispness between intervals
Pro tip: To restore the crispy topping, place the dessert under the broiler for 1-2 minutes after microwaving. This will help revive the crunchy texture of your easy apple crisp recipe.
Fact: Proper storage can help you enjoy your dessert for up to 3 days while maintaining its delicious flavor and texture!
Fun Variations of Apple Crisp
Make your apple crisp recipe exciting with new twists. It turns a classic dessert into a fun adventure. Every home cook enjoys trying new things with apple crisp.
Spice Combinations to Enhance Flavor
Try new spice blends to spice up your apple crisp:
- Add ground nutmeg for warm, earthy notes
- Sprinkle cardamom for an exotic twist
- Mix in ginger for a subtle kick
Caramel Sauce Drizzle Ideas
Indulge in your fruit crisp with these caramel ideas:
- Homemade salted caramel sauce
- Store-bought caramel topping
- Butterscotch drizzle
Healthier Alternatives
Make your dessert healthier with these swaps:
- Replace white flour with whole wheat flour
- Use coconut sugar instead of refined sugar
- Add chopped nuts for extra protein
These changes keep your dessert tasty and healthy.
Fruit Mixture Recommendations
| Fruit Combination | Flavor Profile |
|---|---|
| Apple + Pear | Mild, smooth texture |
| Apple + Cranberry | Tart and sweet balance |
| Apple + Raspberry | Bright, tangy notes |
Try these mixtures to make your apple crisp unique. It will wow your family and friends!
Troubleshooting Common Issues
Making microwave apple crisp can sometimes present challenges, but with a few expert tips, you can overcome common cooking problems and create a delicious dessert every time.
When preparing microwave apple crisp, several issues might arise during the microwave baking process. Knowing how to address these challenges can help you perfect your recipe.
Dealing with a Watery Filling
A watery microwave apple crisp can be frustrating. To prevent excess liquid, try these strategies:
- Add 1-2 tablespoons of cornstarch or all-purpose flour to absorb extra moisture
- Choose firmer apple varieties like Honeycrisp or Braeburn
- Drain excess liquid before adding the topping
- Reduce the amount of sugar, which can release more water
Fixing Overcooked or Undercooked Crisp
Microwave baking requires precision. For perfectly cooked apple crisp:
- Use 50-70% power to prevent uneven cooking
- Check doneness every 2-3 minutes
- Rotate the dish midway through cooking
- Use a microwave-safe dish with even heat distribution
Remember that cooking times can vary depending on your specific microwave. Practice and patience will help you master the perfect microwave apple crisp every time.
Conclusion
You’ve learned how to make a quick apple dessert that’s tasty and easy. This simple apple crisp recipe shows you can make gourmet treats fast with your microwave. It’s all about being easy and flexible.
Just remember a few things: pick the right apples, make a crunchy topping, and use your microwave right. You can make this dessert your own by trying new spices or toppings. It’s all about being creative.
With just a few ingredients and your microwave, you can turn apples into a special dessert. It’s perfect for a quick sweet treat or to impress your family. So, get creative, have fun, and enjoy your delicious dessert!
FAQ
How long does it take to make a microwave apple crisp?
A microwave apple crisp is quick to make. It takes about 5-10 minutes to prepare and 3-5 minutes to cook. This makes it a fast and easy dessert compared to baking in an oven.
What are the best types of apples to use for this recipe?
Firm, slightly tart apples are best for microwave apple crisp. Granny Smith, Honeycrisp, and Braeburn apples are great choices. They keep their shape and offer a nice balance of sweetness and acidity.
Can I make this recipe gluten-free?
Yes, you can make a gluten-free microwave apple crisp. Use almond flour, gluten-free flour, or oat flour instead of regular flour. Make sure all ingredients are gluten-free.
How do I prevent my apple crisp from becoming soggy in the microwave?
To avoid sogginess, use a dish with high sides. Don’t overcook it. Also, make sure your topping has enough butter to crisp up. Let it sit for a minute after cooking to set the topping.
Can I make this dessert ahead of time?
While it’s best served fresh, you can prepare parts ahead. Keep the apple mixture and topping separate. Then, combine and cook just before serving to keep it crisp.
What are some good toppings for microwave apple crisp?
Classic toppings include vanilla ice cream, whipped cream, or caramel sauce. For a healthier option, try Greek yogurt, chopped nuts, or cinnamon whipped cream.
How long can I store leftover microwave apple crisp?
Store leftover apple crisp in an airtight container in the fridge for 3-4 days. Reheat in the microwave for 30-45 seconds. Be careful not to overcook and lose the crisp texture.
Can I use frozen apples for this recipe?
While fresh apples are best, you can use frozen apples. Thaw and drain them well to prevent sogginess. Pat the apples dry before using.
Are there any vegan alternatives for this recipe?
Yes! Use coconut oil or vegan butter instead of butter. Replace dairy with plant-based alternatives like almond milk or oat milk. Make sure your sugar is vegan-friendly too.
What can I do if my microwave apple crisp is too watery?
If your apple crisp is too watery, add a tablespoon of cornstarch to the apple mixture before cooking. Cooking it for an additional 30 seconds can also help reduce excess liquid.

